As transactions occur, it's important to understand the need for updating records. Updating records is vital for several reasons. It corrects any errors made during the initial entry, ensures accurate adjustment of account balances, and allows for the inclusion of any new information that may have been missing in the original entry.
Here is a brief guide on how to update your record inflow or outflow.
Steps in updating a record:

-
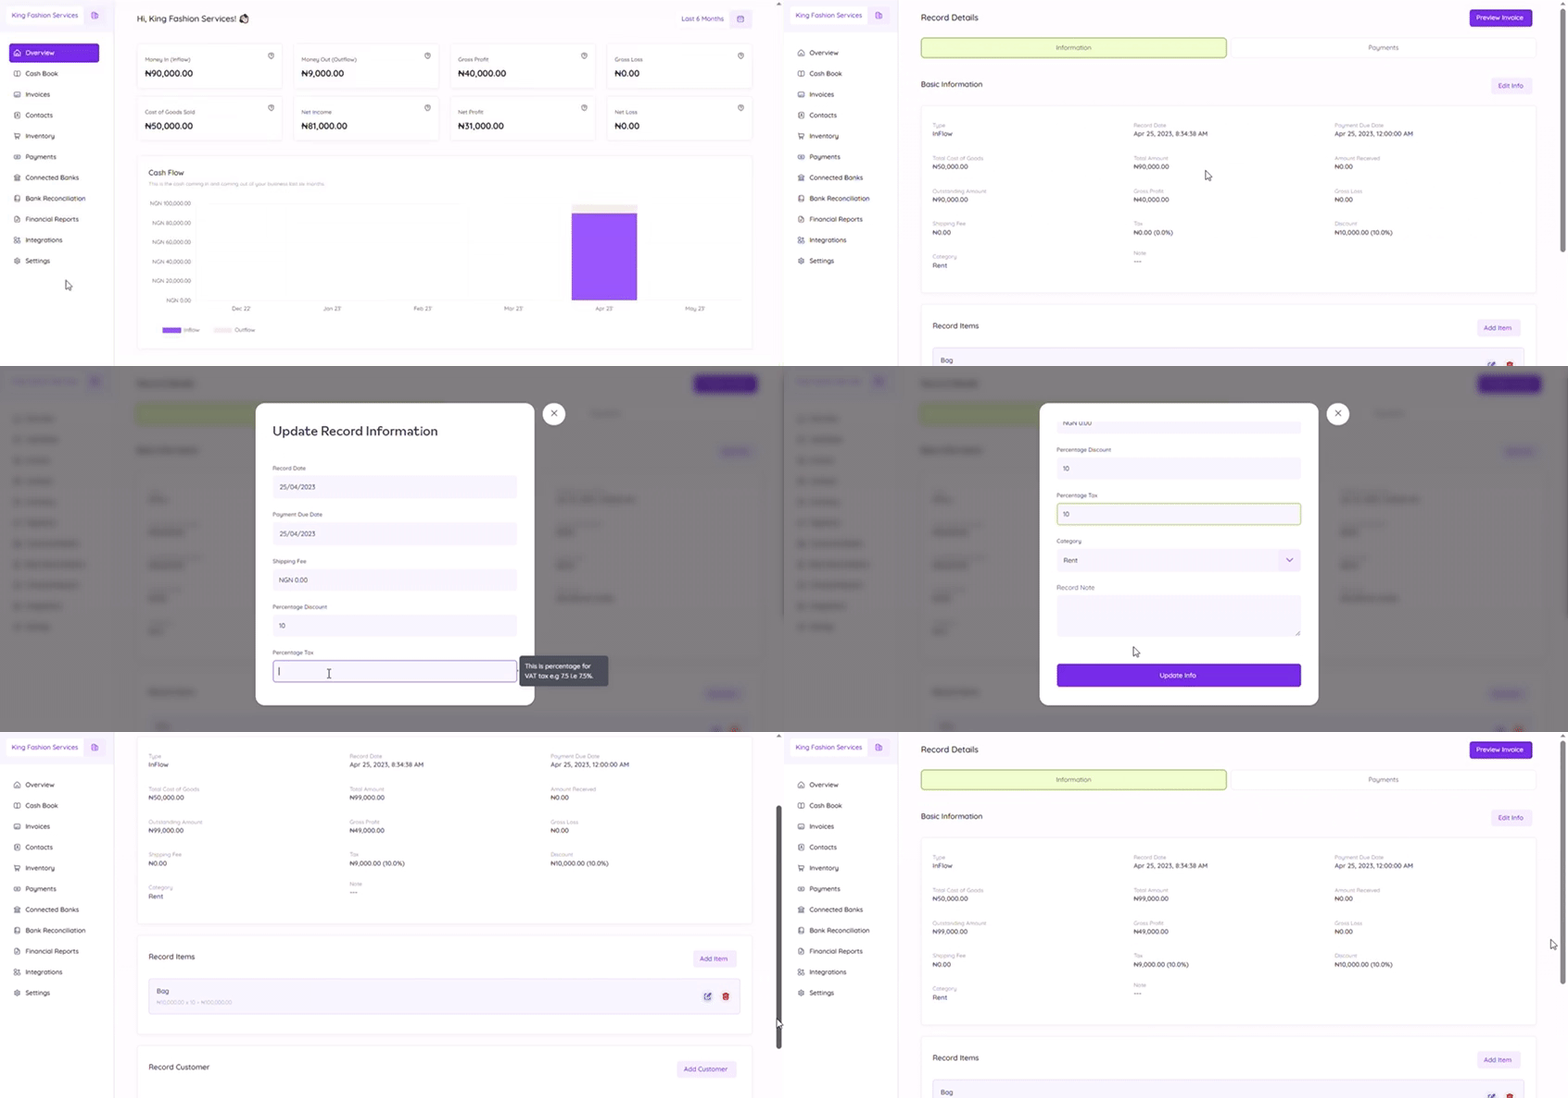
Begin by clicking on https://mybook.tyms.africa/dashboard/records to go to the cashbook page where the list of your records is displayed.
-
Select the record you want to edit and click "Manage" beside it.
-
Click "Edit info" in the information section to edit record details.
-
Fill in the details you want to add and change the ones you’d like to replace.
-
You can enter a "Record date" to ensure that transactions are accurately reported in the correct accounting period.
-
For sales that haven’t been completely paid for, you can select the date a particular payment would be due, "Payment due date" as this would enable easy tracking.
-
It’s optional to add a "Shipping fee" if there’s a cost of delivering the product to you or the customer.
-
You can also enter a "Percentage Discount" if the goods or services were offered at a discounted price.
-
You could also enter "Percentage Tax" on every record. I.e 7.5 for 7.5 percent.
-
Click on the "Update info" button to save all the changes.
-
You can also edit the details of the item you have recorded such as quantity and price/service fee you entered previously by clicking on the edit button beside the item name.
-
You can choose to delete a customer and add another if a mistake has been made with the one already recorded.
-
You can add "Evidence files" by uploading from your computer if there were none previously added and add a caption as a title for the image. You can also edit the caption or delete the image if there was one already uploaded.
Click on "Save" and the evidence file would be saved automatically to that record.


